> For the complete documentation index, see [llms.txt](https://competition.docs.getfoundni.co.uk/llms.txt). Markdown versions of documentation pages are available by appending `.md` to page URLs; this page is available as [Markdown](https://competition.docs.getfoundni.co.uk/branding/logo.md).
# Logo
Adding your Logo and sizing it correctly.
### Get Started
Head over to Get Found -> Headers -> Edit Main
Navigate to the header editor
### Adding your logo
1. Hover over the current site logo and **click the pencil** to reveal the popup editor.
2. Remove the current logo and drag and then click the **"+"** icon to load the media section where you can drag and drop your logo onto the page and then click "**Select**" bottom right
Edit Logo and remove current.
Once Your new logo is selected it should appear in the box.
Make sure the link is left at **"/"** this means when a user clicks the logo it will go back to the homepage. This is a universally known design feature.
### Sizing your logo
If you are using a square logo the default size will suit you well.
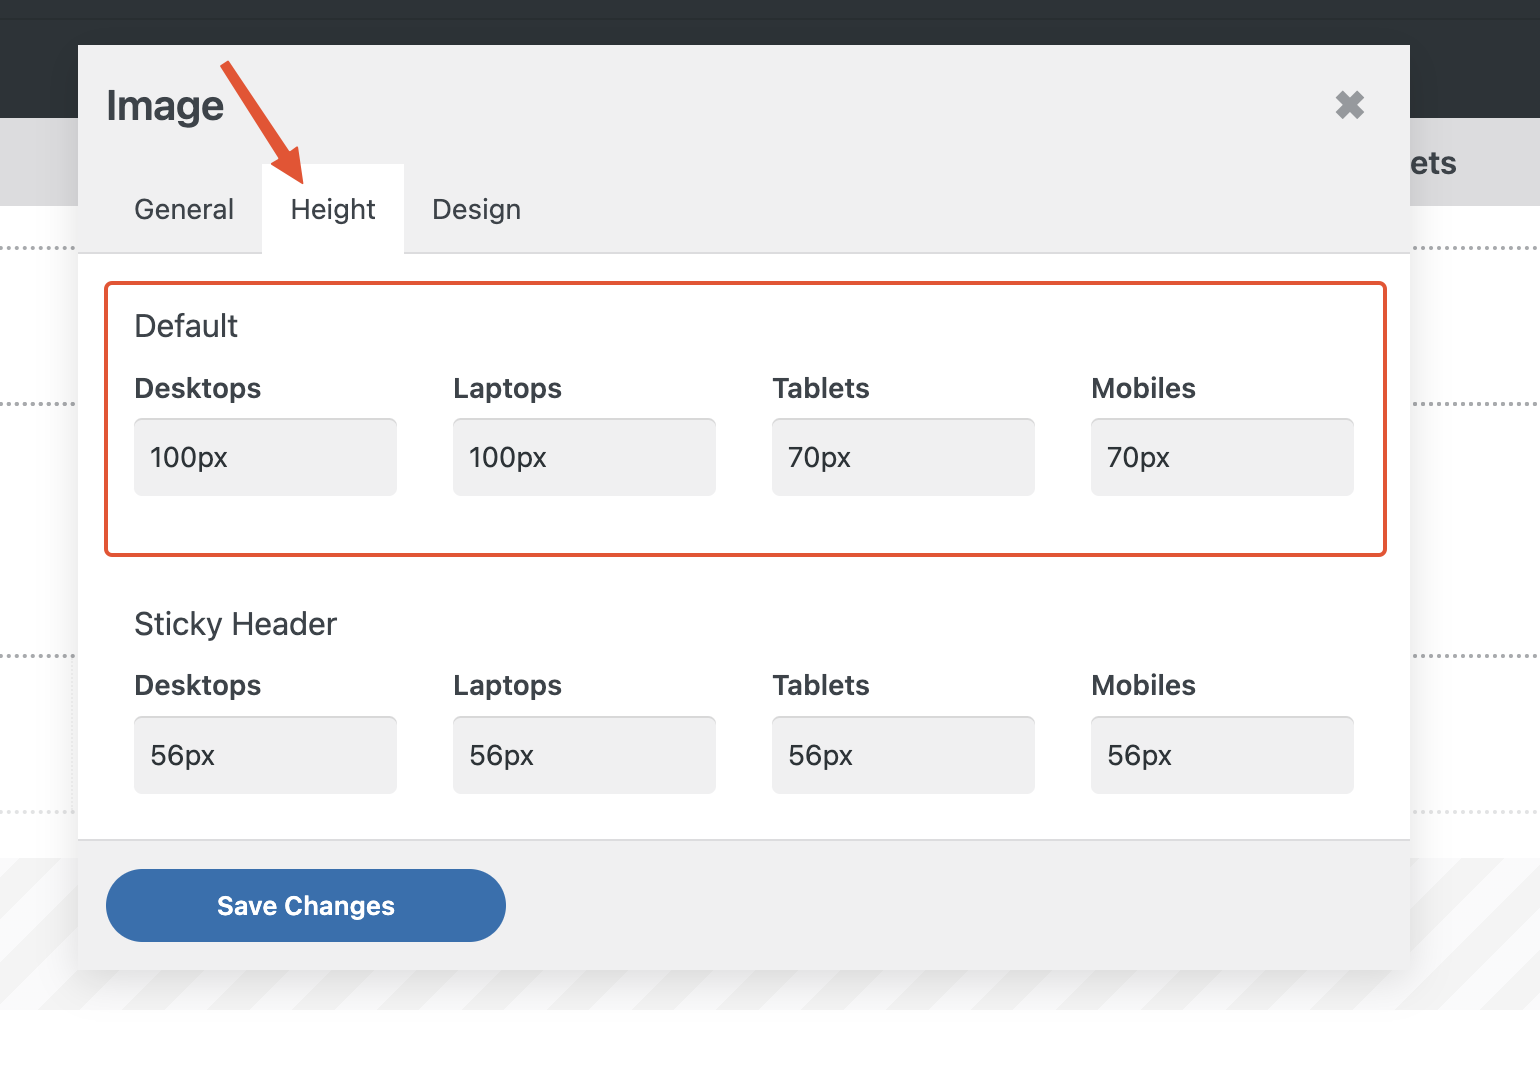
If your logo is a rectangle then you will need to reduce the image height. Below is the default values - you can change these to 60 - 80px, save and see how they affect how big your logo is. Repeat this on all 4 screen sizes